
The Payfim module adds Pay with Crypto to your Zen Cart checkout. The order is created as Pending, the customer pays on your own Payfim Gateway, and the order is switched to Processing automatically when the payment is confirmed on the blockchain.
Before you start, install your Payfim Gateway and add your wallets (see Install the gateway and Add wallets). Compatibility: Zen Cart 1.5.8 – 2.x · PHP 7.4 – 8.4.
- Upload the files.
Unzip
payfim-zencart.zipand upload the contents of thepayfim-zencart/folder to your store root - the folder that contains Zen Cart'sindex.php. Only new files are added, no core file is overwritten:payfim_webhook.phpincludes/modules/payment/payfim.phpandincludes/modules/payment/payfim/includes/languages/english/modules/payment/lang.payfim.php(+ legacypayfim.php)includes/classes/observers/auto.payfim.php
Tip: If you use a template override folder or another admin language, the files above still go to the default locations shown.
- Install the payment module.
In the admin open Modules > Payment, click Payfim Crypto Payments in the list and then Install Module in the right-hand box.

Modules > Payment > Payfim Crypto Payments > Install Module - Enter your gateway details.
The settings form opens. Enter the Gateway URL (for example
https://pay.yourstore.com) and the API key from your gateway admin (Integrations). The order statuses are pre-set: Pending while waiting, Processing when paid and Crypto underpaid (created by the module) for short payments. Click Update.
Payfim settings Tip: The API key is stored masked and never shown again in the admin.
- Test the connection.
With Payfim selected in Modules > Payment, click Test connection in the right-hand box. A green message confirms the gateway version and the coins you accept. Webhooks need no setup: the webhook URL shown there is sent to the gateway with every invoice.
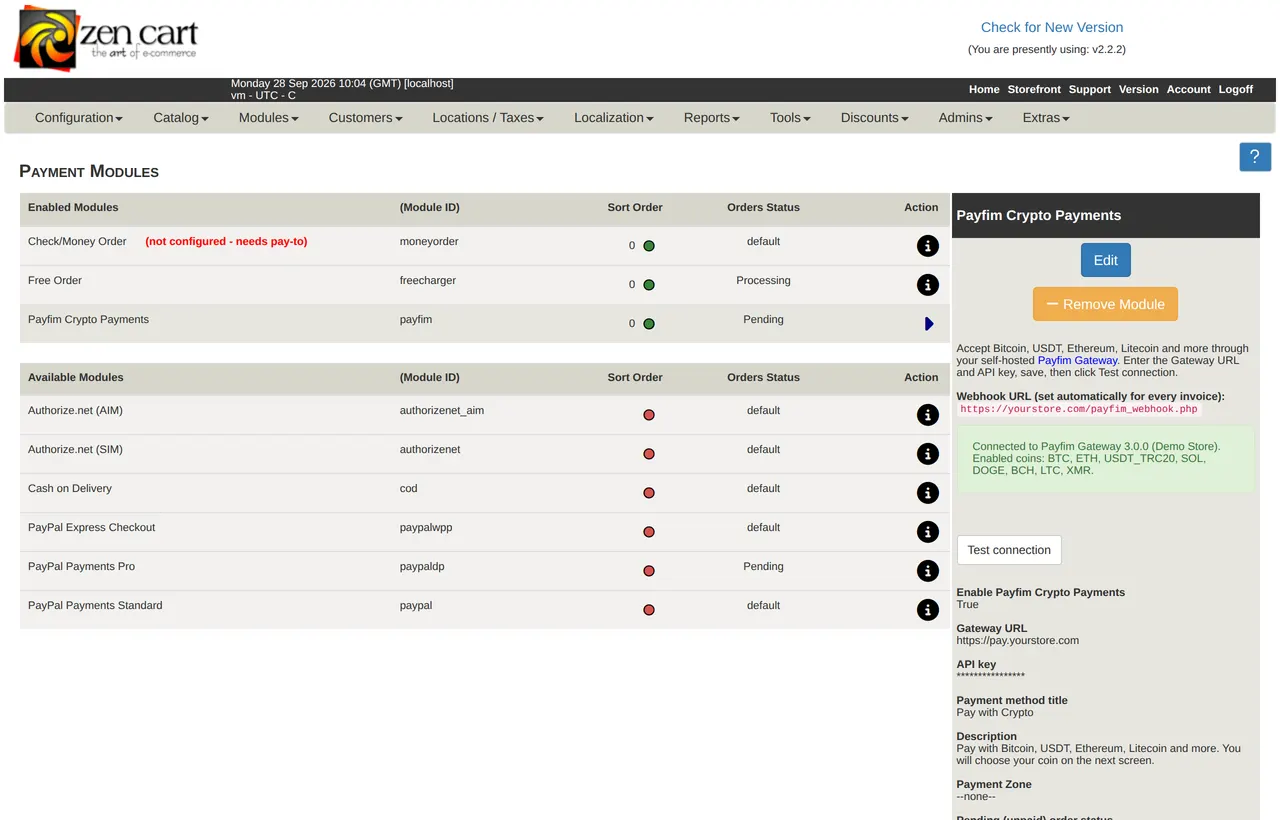
Test connection succeeded - What your customers see.
Customers now see Pay with Crypto in the payment step. After confirming the order they are sent to your gateway to pick a coin and pay, then return to the Thank you page.
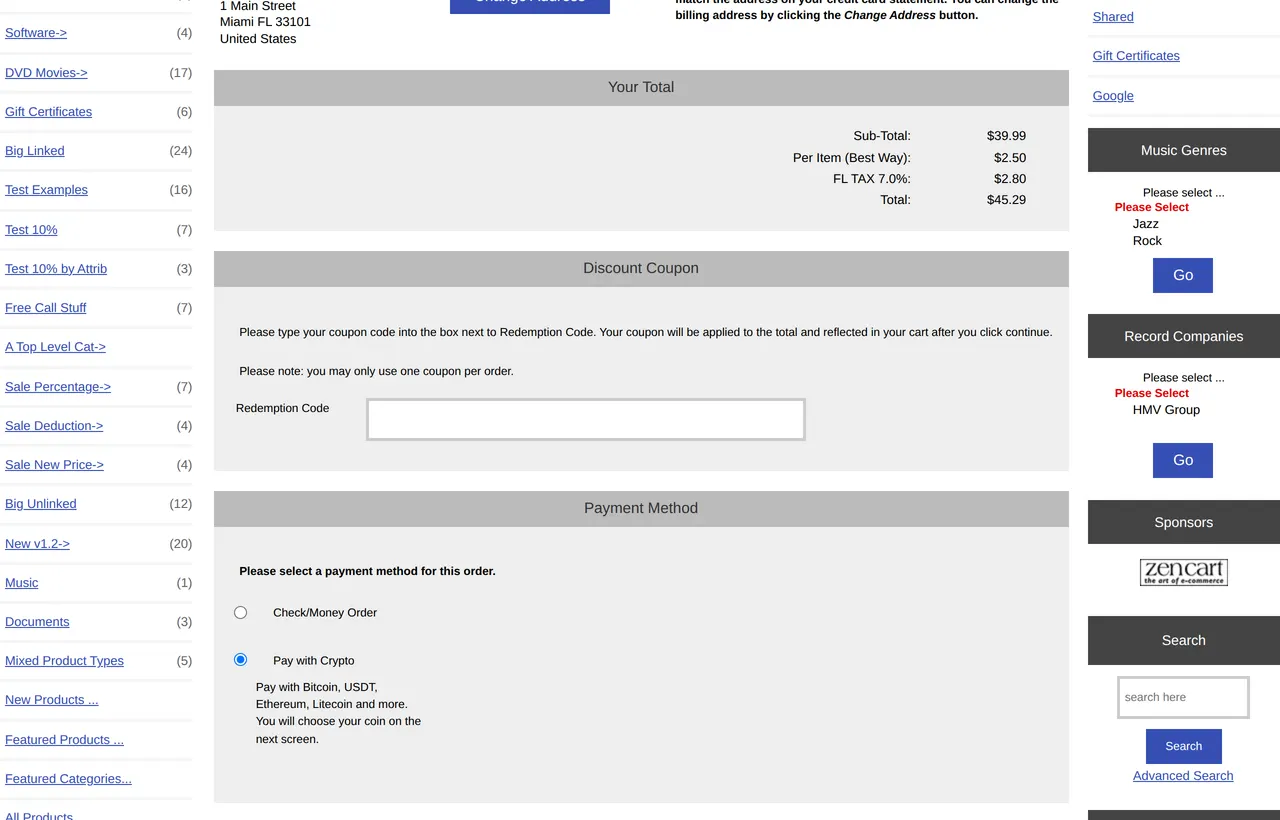
Checkout: Pay with Crypto - Check paid orders.
Open the order in Customers > Orders. The status history shows the confirmation with the coin, amount and transaction hash, and Click for Additional Payment Handling Options shows the Payfim invoice panel.

Customers > Orders > order: Payfim panel and status history Tip: Underpaid payments set the order to Crypto underpaid and are never marked paid. If a quote expires unpaid a comment is added (choose an Expired order status in the settings to change the status as well).
Troubleshooting
- Pay with Crypto is not shown at checkout
- Check that the module is installed with Enable = True, that Gateway URL and API key are filled in (the admin list shows "not configured" otherwise) and that no Payment Zone excludes the customer's address.
- "Crypto payment is temporarily unavailable" on the payment page
- The store could not reach the gateway, so no order was created. Run Test connection and check the Gateway URL, the API key and outgoing HTTPS on your server.
- Order stays Pending after paying
- The gateway could not deliver the webhook to
https://yourstore.com/payfim_webhook.php. Check the webhook log on the invoice in your gateway admin; make sure the file was uploaded and is not blocked by .htaccess or a firewall. - Need details
- Set Debug logging to True and look in
logs/payfim-YYYYMM.login your store folder.
Get the Zen Cart Crypto Payment Module - the download includes an illustrated PDF version of this guide.