
Why PrestaShop merchants add crypto
Crypto buyers tend to be people who already hold coins and would rather spend them than go through a card form. For a PrestaShop store that sells across borders, it also avoids a familiar set of card problems: cross-border declines, chargebacks weeks after delivery, and processors that decline certain product categories.
The Payfim module adds one payment option to your checkout. The customer pays on your own branded crypto checkout, hosted with the Payfim Gateway on your server, and the coins go to your wallet. Blockchain payments are final, so there is no chargeback process. Payfim charges no fee per order; you pay once for the module.
It also means no onboarding with Payfim: no business verification, no product category review, no account that can be frozen. You install the gateway, add your wallet addresses and start accepting payments the same day. Consult a qualified professional about the tax and reporting rules for crypto receipts in your country, as they differ widely.
Order states your team will recognize
PrestaShop runs on order states, and staff work from the Orders list by state. The module fits into that instead of hiding crypto orders in a generic "awaiting payment" pile. On install it creates two states of its own:
| Situation | Order state |
|---|---|
| Order placed, customer on the crypto checkout | Awaiting crypto payment (created by the module) |
| Payment confirmed on the blockchain | Payment accepted (or another paid state you choose) |
| Customer sent less than the total | Crypto underpaid (created by the module) - never Payment accepted |
| Quote expired or cancelled without payment | Canceled, only while the order is still awaiting payment |
When an order moves to Payment accepted, PrestaShop does what it always does: it sends the customer email and can generate the invoice. The payment is added to the order with the blockchain transaction hash as its transaction ID, and a private order message records the coin and the amount received.
If you uninstall the module, its settings are removed but the two order states and the payment records stay, because existing orders still reference them. Reinstalling picks them up again.
What the customer experiences
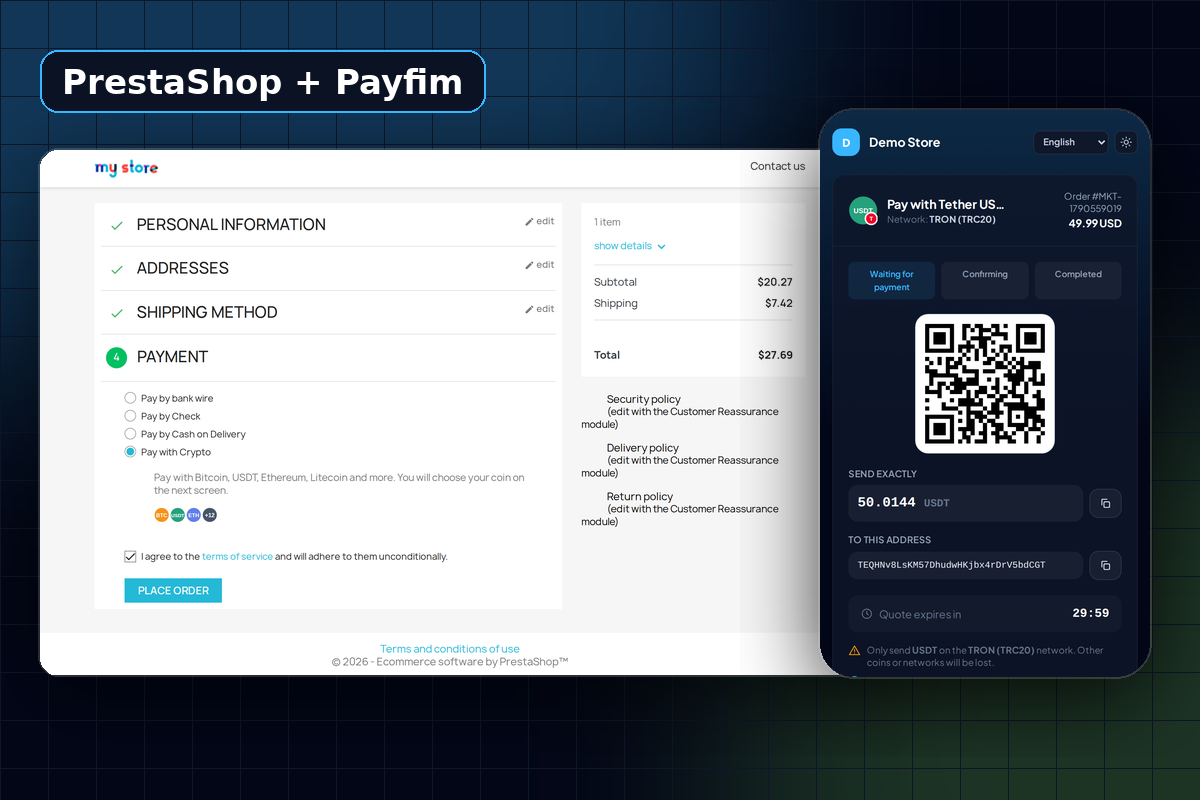
- At the payment step the customer picks Pay with Crypto. You choose the title and short description shown there. Guest checkout works too, so shoppers do not need an account.
- PrestaShop creates the order in Awaiting crypto payment. The module creates the crypto invoice server-to-server from the order total and currency, and redirects to your checkout.
- The customer chooses a coin, scans the QR code and pays. The checkout is available in English, Spanish, French, German, Portuguese and Turkish.
- When the payment is confirmed, the customer lands on PrestaShop's order confirmation page with a "payment received" message.
If the customer closes the tab before paying, the order confirmation page offers a Pay now with crypto button. It re-opens the same invoice instead of creating a new one, and it only works for orders that are still unpaid, so nobody can be asked to pay twice.
Back office details
Every order paid with crypto shows a Payfim crypto payment panel on the order page with the Payfim invoice, coin and amount received. The configuration page has a Save & test connection button that confirms the gateway is reachable and lists your enabled coins, and an optional Debug logging switch that writes to Advanced Parameters → Logs.
Use PrestaShop's own Payment → Preferences to limit the option by currency, country or carrier. You do not need to set up webhooks: the webhook address is sent to your gateway with every invoice, and every notification is signed with HMAC-SHA256 and re-checked with the gateway before an order state changes. See the security overview.
If a webhook ever fails - for example while the shop is in maintenance mode - the gateway retries delivery for 24 hours, and each attempt is listed with its HTTP status in the gateway admin.
A note for stores with several carriers: when one cart is split into several orders, the customer pays one crypto invoice for the combined total. The payment is recorded on the first order and all orders of that cart move to the paid state.
Which coins should a PrestaShop store offer?
Your gateway supports 16 coins and networks, but a shorter list is easier for shoppers. A practical start for most stores:
- USDT on TRON (TRC20) - dollar value, low network fees, widely held. See accepting USDT TRC20.
- Bitcoin - the coin shoppers ask for by name.
- USDC or USDT on Ethereum - for customers who keep stablecoins on Ethereum. These need a free Etherscan API key.
- Litecoin - fast and cheap to send.
USDT on TRON and USDT on Ethereum appear as separate choices on the checkout, each with its own address format, so shoppers cannot mix up networks. Our comparison of USDT and USDC for online stores explains the differences.
Whatever you enable, the exchange rate is locked for 30 minutes once the shopper chooses a coin, with rates from CoinGecko and Coinbase or Binance as fallbacks. If you want to steer customers toward crypto, set a negative price adjustment in the gateway - for example -5% - and the crypto amount shown is reduced accordingly.
Requirements
| PrestaShop | 1.7.8, 8.x and 9.x (tested live on 8.2.1) |
|---|---|
| PHP | 7.4 - 8.4 (as supported by your PrestaShop version) |
| Installation | Module Manager upload, no FTP needed |
| Checkout | Standard PrestaShop checkout, including guest checkout |
| Gateway | Payfim Gateway 3.0+ (included in your download) |
How to install the PrestaShop crypto payment module
- Install the Payfim gateway. Put the gateway on your hosting (for example
pay.yourstore.com), run the installer and add your wallet addresses. See installing the Payfim gateway. - Upload the module. In the back office open Modules → Module Manager, click Upload a module and drop in
payfim.zipwithout unzipping it. Click Configure when PrestaShop says the module is installed. - Connect. Enter your Gateway URL and the API key from your gateway's Integrations page, adjust the title and description, and click Save & test connection. A green bar lists your coins.
- Check the checkout. Optionally limit currencies, countries or carriers in Payment → Preferences.
- Test. Add a product to the cart, choose Pay with Crypto and pay a small amount. The order should move to Payment accepted. Step-by-step help is in the PrestaShop docs.
Screenshots